Tie a tie
|
Military bun
|
TC3-21.5
|
Ribbon Sorter
|
Cadet Refrence
|
AR670-1
|
CCR145-2
|
Drill Movements
|
Tie a tie | Military bun | TC3-21.5 | Ribbon Sorter | Cadet Refrence | AR670-1 | CCR145-2 | Drill Movements |
Cadet
Resources
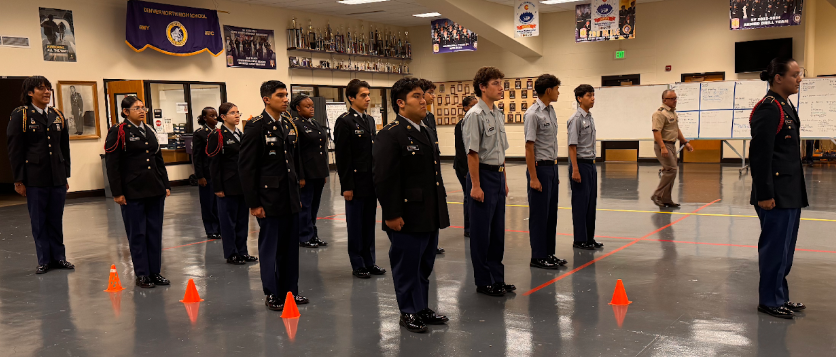
-
Keep your upper body straight and your arms at your sides.
Turn your body 90 degrees to the left by pivoting on the ball of your left foot and the heel of your right foot.
As you turn, keep both legs straight and keep your feet in contact with the ground.
Once you are facing left, bring your right foot next to your left foot.
End in the position of attention, with your heels together, toes pointed forward, arms at your sides, and eyes straight ahead.
-
Keep your upper body straight and your arms at your sides.
Turn your body 90 degrees to the right by pivoting on the ball of your right foot and the heel of your left foot.
As you turn, keep both legs straight and keep your feet in contact with the ground.
Once you are facing right, bring your left foot next to your right foot.
End in the position of attention, with your heels together, toes pointed forward, arms at your sides, and eyes straight ahead.
-
Keep your upper body straight and your arms at your sides.
Raise your right toe slightly and place your weight on the ball of your right foot.
Turn your body 180 degrees to the right by pivoting on the ball of your right foot and the heel of your left foot.
Keep both legs straight as you turn.
Once you are facing the opposite direction, bring your right foot next to your left foot.
End in the position of attention, facing directly opposite the direction you started.
-
Bring your heels together with your toes pointed slightly outward.
Straighten your legs and keep your body upright.
Keep your arms straight at your sides with your fingers together.
Keep your head and eyes facing forward.
-
Keep your right foot in place and move your left foot about 10 inches to the left.
Place your left hand over your right hand behind your back.
Keep your arms straight and your body upright.
Keep your head and eyes facing forward.
-
Keep your right foot in place and move your left foot about 10 inches to the left.
Keep your arms at your sides.
Relax your body slightly while keeping your posture straight.
Keep your head and eyes facing forward.
-
Keep your right foot in place.
Relax your stance and move as needed while remaining in your assigned area.
You may relax your arms and talk if permitted.
Remain aware of your surroundings and ready for the next command.
-
Keep your right foot in place.
Relax and move more freely than you would at ease.
You may adjust your stance, arms, or uniform.
You may talk if permitted, but remain in your assigned area.
-
Turn your head and eyes to the right.
Extend your left arm straight out to the side, if required by your drill instructions.
Use the person to your right as a guide.
Make small adjustments to your position until you are properly lined up.
Hold the position until the next command.
If you are the person fully to the left, keep your hand extended to your side.
If you are the person fully to the right, keep your head and eyes facing forwards.
-
Start at the position of attention.
Raise your right hand to the proper salute position.
Keep your fingers together and your arm in the proper position.
Keep your head and eyes facing forward.
Hold the position until the next command.
-
Start from the present-arms position.
Lower your right hand back to your side.
Keep your body straight and your eyes forward.
Return to the position of attention.
-
Start from the position of attention.
Step forward with your left foot.
Continue marching forward, alternating your left and right feet.
Keep your arms moving naturally with each step.
Keep your head and eyes facing forward.
Maintain the same pace and direction as the rest of the formation.
-
Begin by bringing your left foot down.
Continue lifting and lowering each foot without moving forward.
Keep your knees at the appropriate height for your drill standard.
Keep your arms moving naturally.
Stay in the same spot while maintaining the marching rhythm.
The movement should look like marching in place, with everyone staying in their original position.
-
Continue marching until the command is given.
Take the required step with your left foot.
Bring your right foot alongside your left foot.
Return to the position of attention.
Stop moving and remain still.
-
While marching, bring your left foot forward.
Pivot to the right using the ball of your right foot.
Turn 90 degrees to the right.
Bring your left foot into the new direction of travel.
Continue marching forward.
-
Continue marching forward until the command is given.
Step with your left foot and turn 90 degrees to the left.
Bring your right foot forward in the new direction.
Continue marching in the new direction.
Keep your head and eyes facing forward.
Maintain your spacing and alignment with the formation.
-
The command of execution MARCH is called on the left foot.
After the command MARCH is called the squad leader will take one step forward then pivot 90 degrees to the left. (In a signal file line)
The rest of the squad will follow behind pivoting in the same spot as the squad leader.
-
The command of execution MARCH is called on the right foot.
After the command MARCH is called the squad leader will take one step forward then pivot 90 degrees to the right. (In a signal file line)
The rest of the squad will follow behind pivoting in the same spot as the squad leader.
-
Continue marching forward until the command is given.
Take the required step and turn 180 degrees to the right.
Complete the turn while keeping your body upright and maintaining your marching rhythm.
Continue marching in the opposite direction.
Keep your head and eyes facing forward.
Maintain your spacing and alignment with the formation.
-
Continue marching at the current pace.
Bring your right foot forward and place it beside your left foot.
Immediately step forward with your left foot.
Continue marching normally.
Use the movement to get back in step with the formation.
-
Continue marching forward normally.
Turn your head and eyes to the right.
Keep your body and shoulders facing forward.
Keep your arms moving normally while marching.
Keep your eyes focused toward the person or reviewing party on your right.
Continue marching until the command “Ready, FRONT” is given.
-
Continue marching forward.
Turn your head and eyes back to the front.
Keep your body facing forward throughout the movement.
Continue moving your arms normally.
Return your head to a straight-forward position.
-
• Step 1: Cross Over
Cross the wide end over the narrow end to the left.
• Step 2: Up and Through
Bring the wide end up through the neck loop from underneath.
• Step 3: Down and Left
Pass the wide end down and pull it completely through to the left side.
• Step 4: Go Behind
Take the wide end and pass it horizontally behind the narrow end to the right side.
• Step 5: Up to the Front
Bring the wide end up toward the center neck loop.
• Step 6: Down and Right
Tuck the wide end down through the neck loop, keeping it on the right side. (You should now have a small triangle base around the narrow end).
• Step 7: Front Wrap
Bring the wide end horizontally across the front of the knot from right to left to create a smooth face.
• Step 8: Up Through the Loop
Bring the wide end up through the neck loop from underneath one final time.
• Step 9: Tuck Through the Knot
Tuck the wide end straight down through the loop you just created across the front.
• Step 10: Tighten and Adjust
Hold the narrow end with one hand. Slide the knot up toward your collar with the other hand. Center it tightly against your top button.
-
Tying a tie properly is an important skill to have because, when tied right, it demonstrates professionalism with a sharp and clean appearance.
Tying a tie in JROTC matters because it is apart of the ACSU uniform and is necessary to receive full credits during inspection.
cadet reference
Ar 670-1
Tc 3-21.5
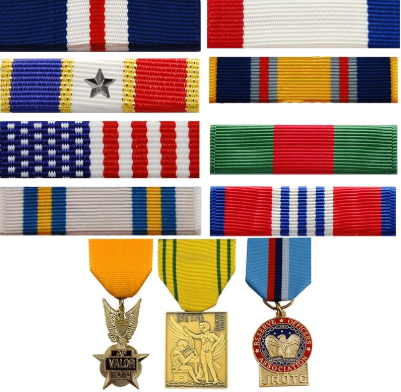
Ribbon Checker